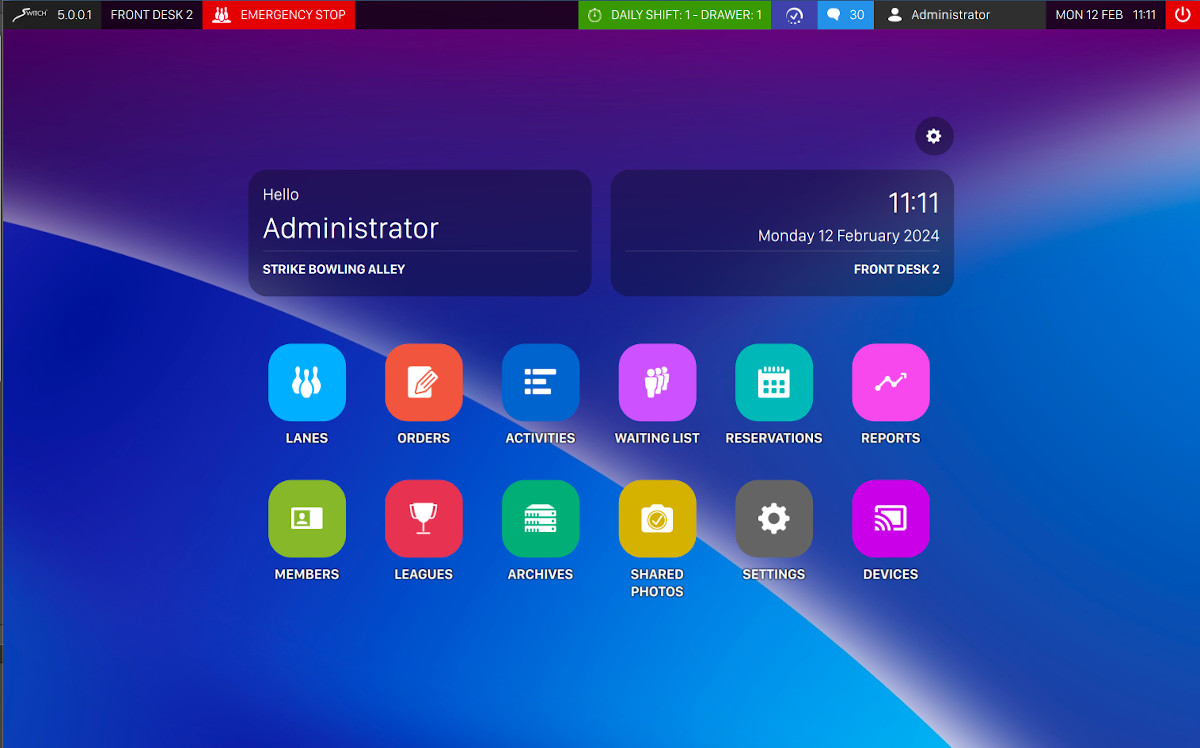
The desktop is the screen that is opened every time an operator login into the software.
Click on any icon on the central dock to access the Genie system’s functions. Each item can have a notification number, which indicates and warn the user about some events on on that specific area of the software.
4.1 Navigating in Genie
A click on an Icon gives access to its related window.
When the operator opens a window then it will be kept opened in background until it is explicitely closed. Each window has its own close button and once clicked the window will be closed and removed from the background. If the window button on the dock has a white border then it means that is is still open in background. Each window has a minimize button located at the top right of the screen at the left of the close window button. If you click this button the the window will be minimized on the dock but it is still alive on background.
4.2 Top header
At the top of the screen you can find the header, where you can see and access some features.

-
Software information: click on the software logo to expand a dropdown menu with the following items
-
Last changes: opens a window where you can find all the information about the current version of the software and its recent changes
-
Software manual: opens a web view where you can see the html version of the current manual. Note that in order to visualize the manual you need an internet connection
-
Align license offline: allows you to perform the offline license align procedure
-
Restart frontdesk: allows you to restart the current frontdesk instance
-
-
The name of the current frontdesk. Each frontdesk is numbered progressively. By default ‘Front desk 1’ is installed on the server machine. It is possible to update the name of the Front Desk from
Advanced settings > Pos devices -
The Emergency stop button, which will turn off all the pinsetters
-
The External orders button, that shows the number of active sales made by a third party POS device. Clicking on it opens a window that shows a more detailed list of the sales. This feature is described in detail in the External POS sales section.
-
The selector of the current shift and the current drawer
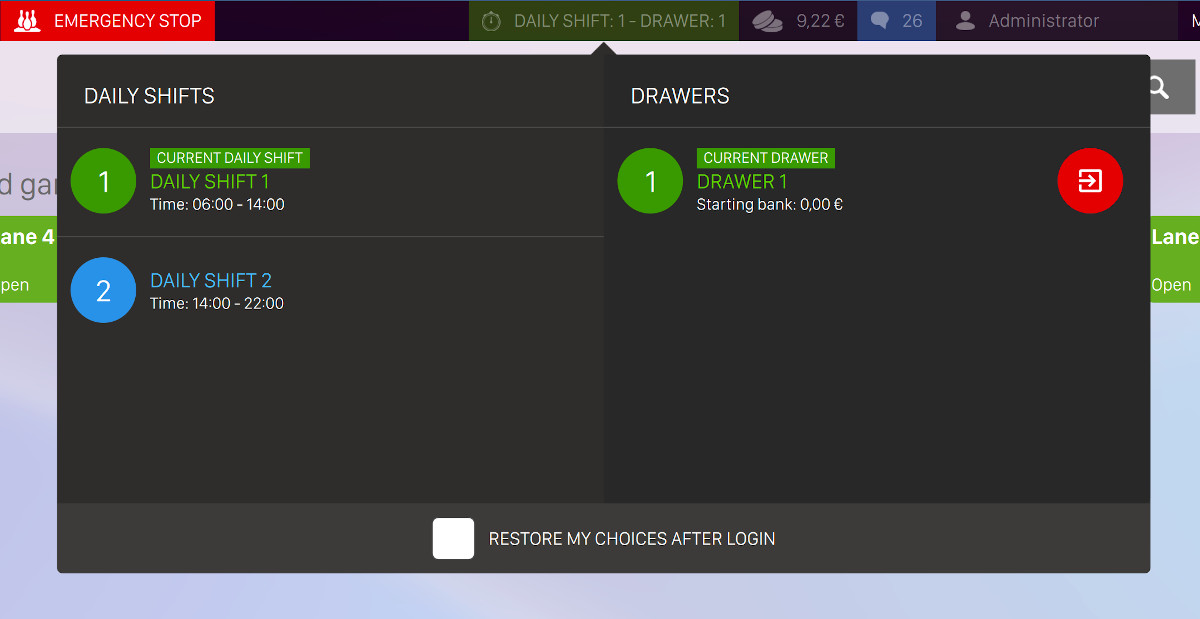
This dropdown section will allow you to select/deselect the current daily shift and the current drawer. For more information about daily shifts and drawers see the proper section
-
A notification about the latest economical transactions, with the relative amount, if any. By clicking on this icon a dropdown menu will appear and show you the latest five transactions that have been made. For each item you can see:
-
The amount of the transaction
-
The time when the transaction has been made
-
Print button: allows you to print the receipt of the transaction on the thermal printer
-
Send email: allows you to send the receipt to a specific email address. A dialog will appear and you will be asked to enter the email address to which you want to send the receipt
-
-
The time clock button, which is visible only if time clock has been enabled from the preferences
-
The messages received. See Messages section for more information about messages
-
The User button, which will open a dropdown menu with the following buttons:
-
Lock screen: lock the screen of the current frontdesk
-
Logout: logout the current user from the software
-
-
Current date and time of the frontdesk
-
The exit button that, if clicked, opens a window where you can:
-
Close application: close the current frontdesk software. Attention: if the workstation is also the bowling center server and if you decide to shut it down, then you will disconnect all the lanes
-
Shut down whole system: shuts down all the lanes, all the workstations, the monitors and the server
-
Cancel: closes the dialog
-
4.3 Time clock
If the time clock settings has been enabled from the preferences section then employees / operators can clock in and clock out from the system by simply clicking the relative button on the topnav, as explained on the section above. After clicking on the button a pop-up window will appear:
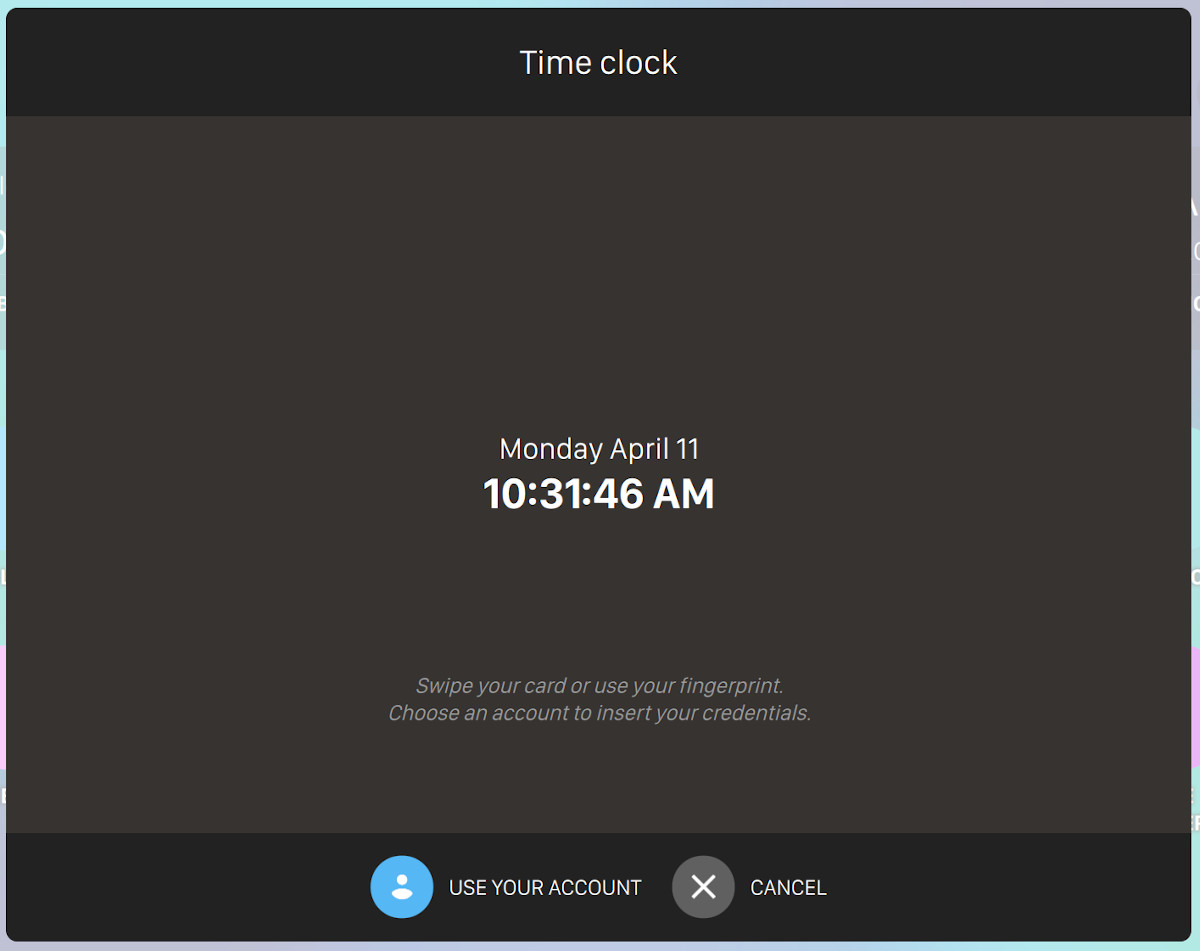
From this window operators and employees can clock in and clock out with three different methods:
-
By swiping the personal card. Operators’ cards can be managed from this section
-
By using the fingerprint. Operators’ fingerprint can be set from this section
-
By clicking the button use your account. After clicking the button you will be able to select an operator from a dropdown and then enter the password on the relative field
Once the operator has been recognized with one of the methods explained above a confirmation message will appear:
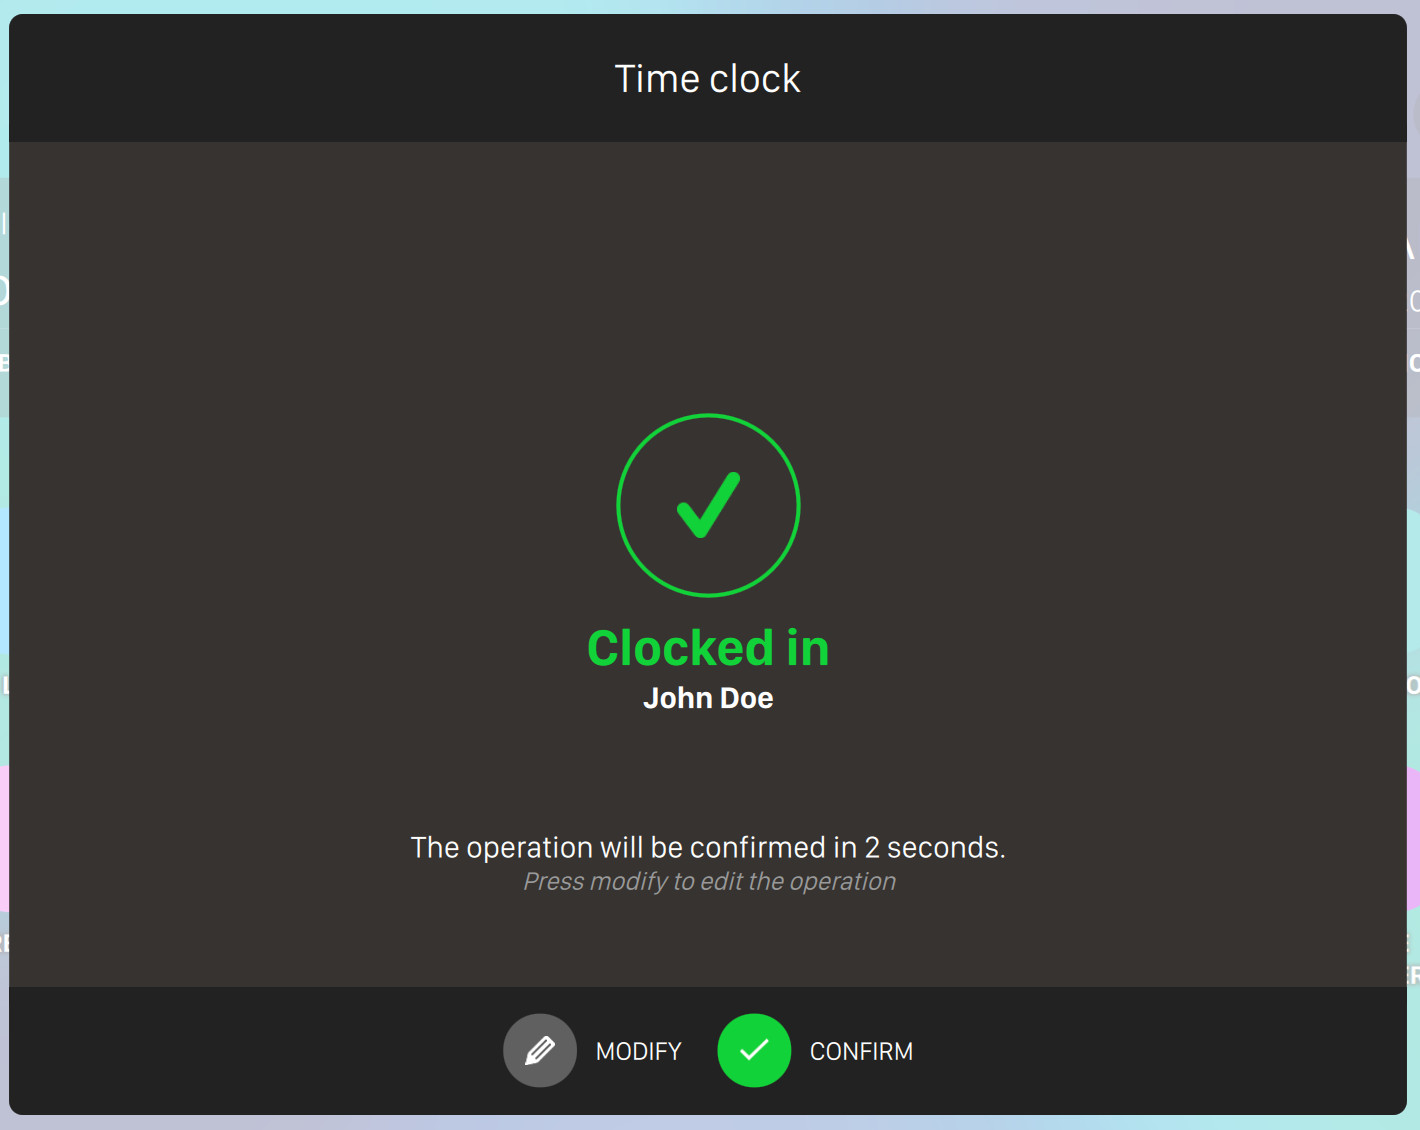
Click on confirm button to confirm the operation. If no action is taken then the operation will be automatically confirmed after 5 seconds. It is also possible to alter the operation by clicking on modify button:
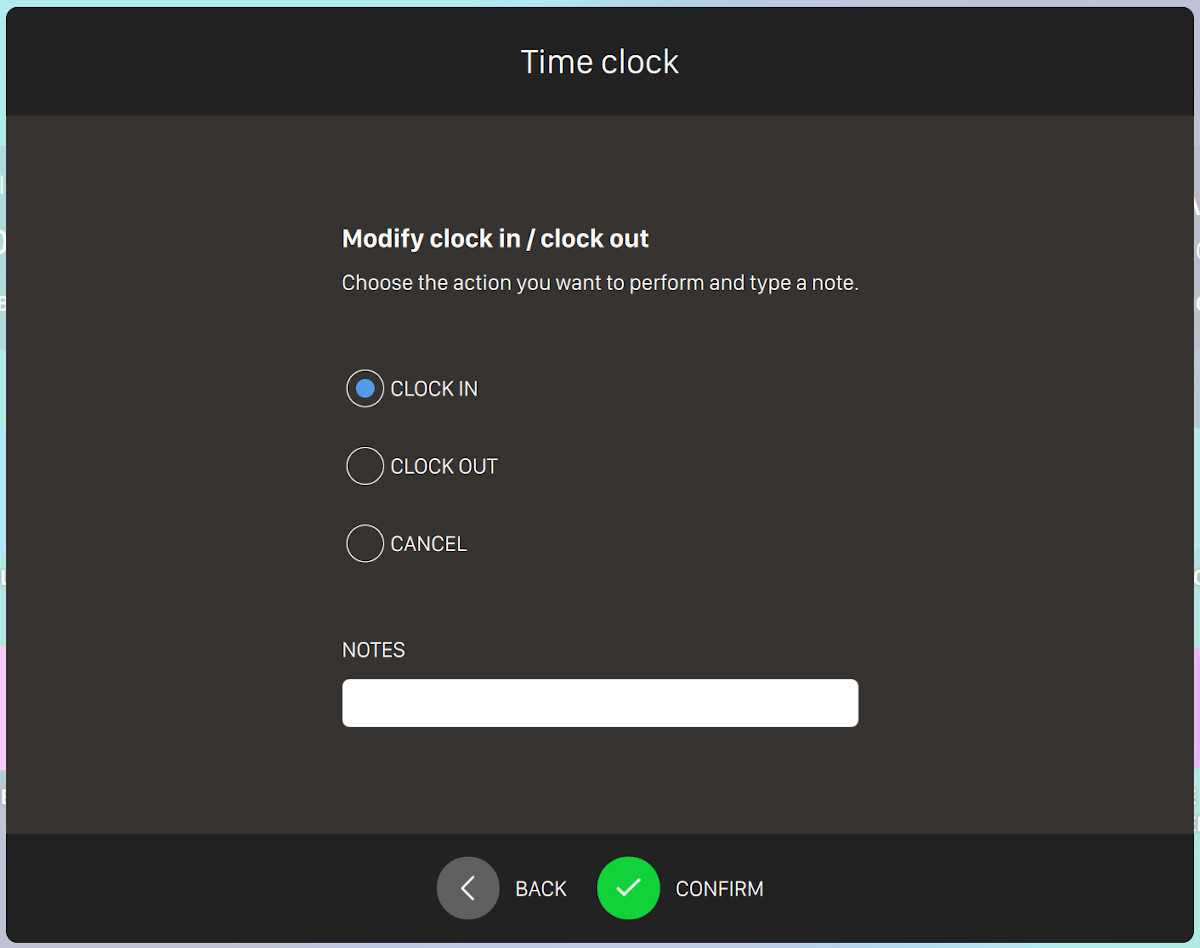
Choose the action you want to perform:
-
Clock in
-
Clock out
-
Cancel: this option will abort the current operation
You can also add some notes to the operation edit. Click on confirm to proceed with the alteration or click on back button to return to the previous window.
4.4 Messages
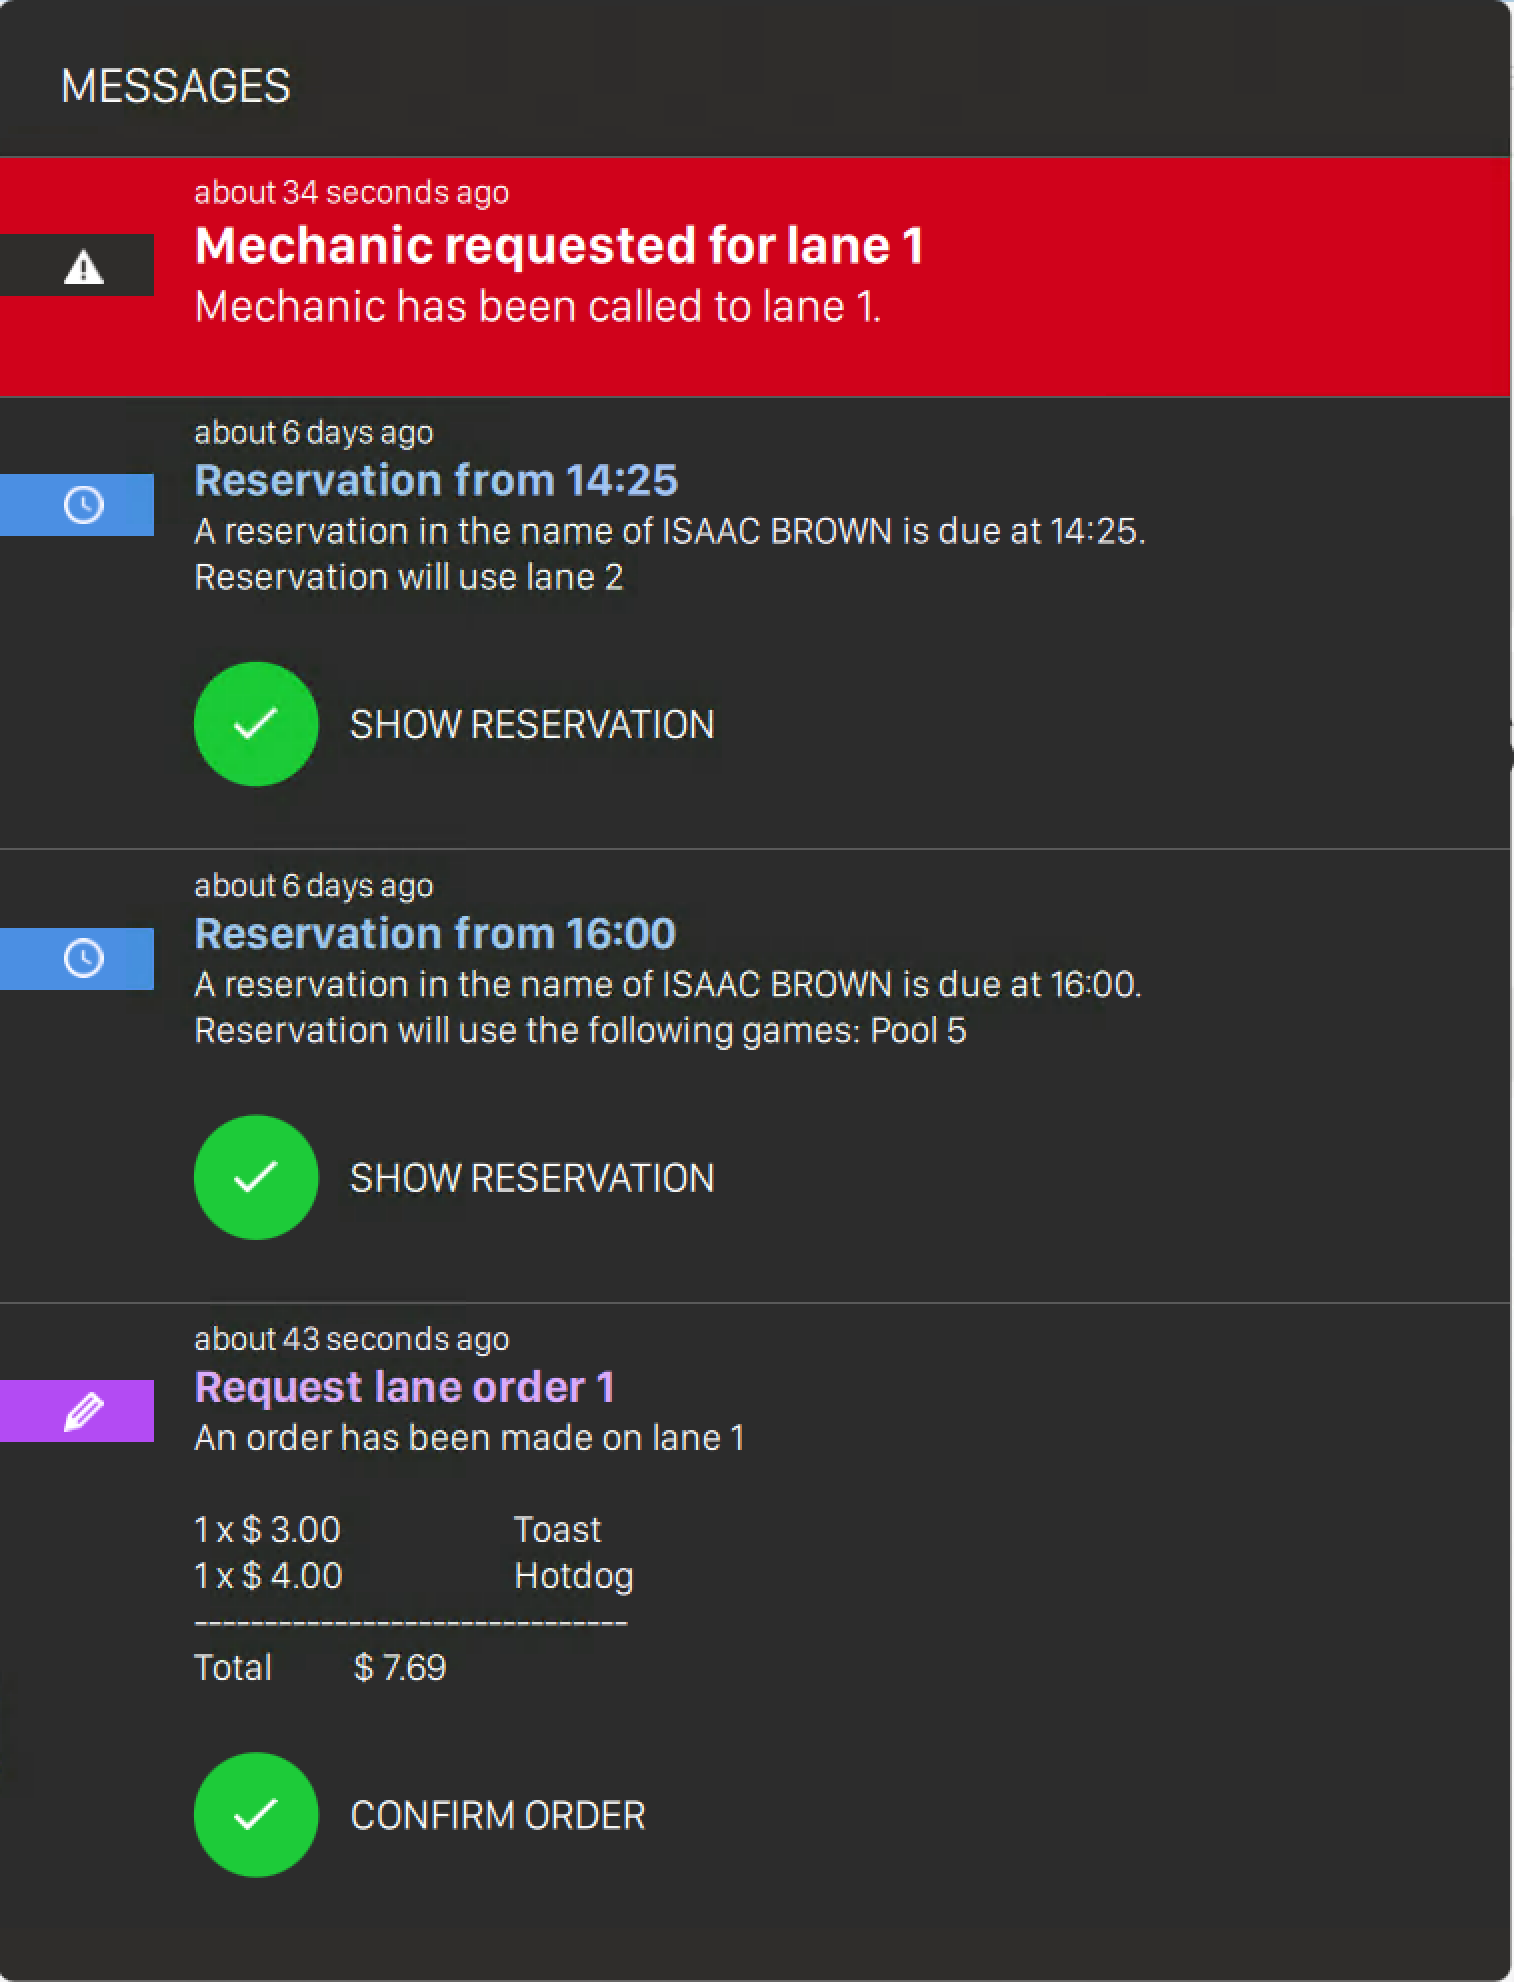
Messages are notifications generated automatically by the software, by the lanes or by the customers’ console and allow operators to take the proper action. Message menu is located on the top header, and if toggled it displays all the messages that have not been archived yet. For more information about the visualization of messages please see Message archive section.
Each message displays:
-
The icon related to the type of message
-
Date and Time of the message or, if the message is recent, a representation of the timestamp in ‘ago’ format (e.g. ‘about 1 minute ago’)
-
Title of the message
-
Text of the message
-
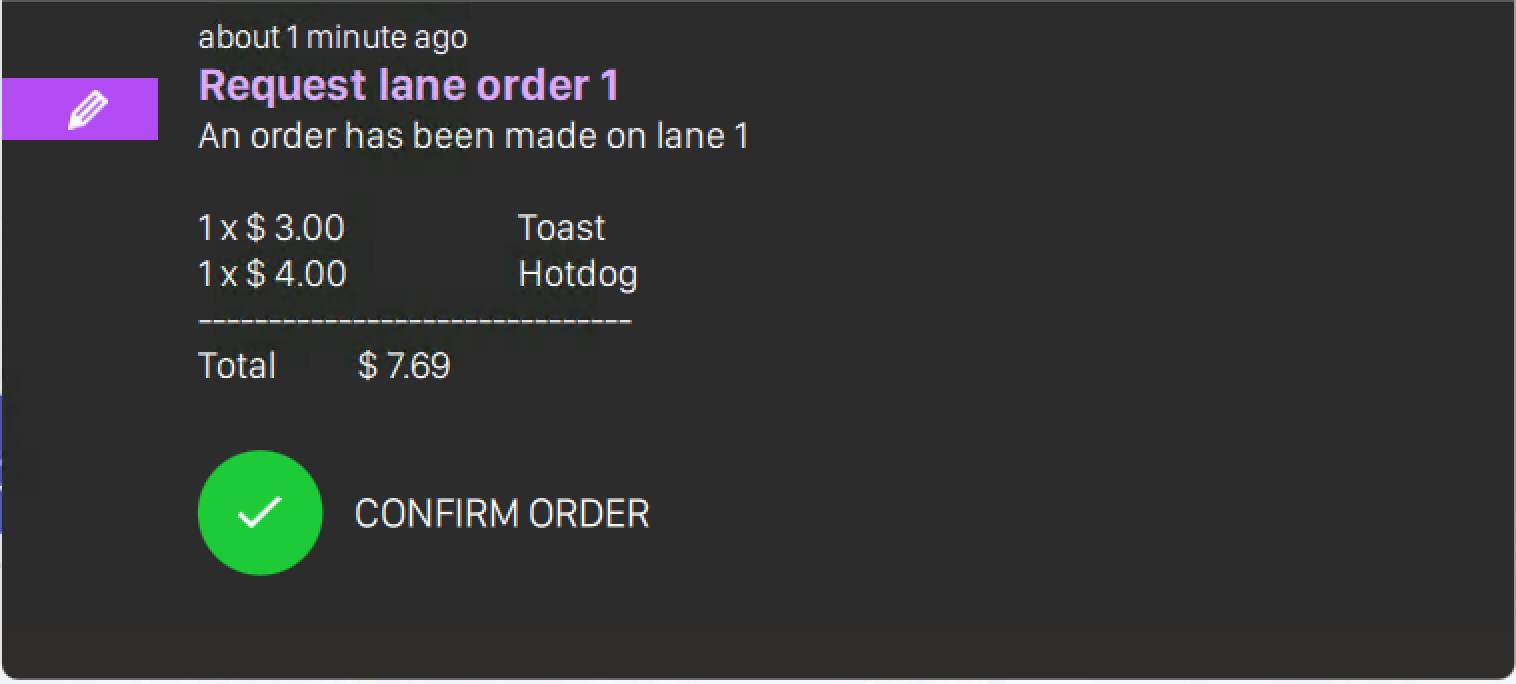
For some types of message, it is possible to execute some operations with a proper button: for instance, for items ordered from a lane, it is possible to confirm the order
If you click on the message or swipe it from right to left then a trash icon will appear. If you click on this icon then the message will be archived and removed from the message dropdown menu.
Note that some messages require an operation to be performed before they can be archived.
4.4.1 Intercom notifications
If intercom option is enabled on your software license and your console device(s) are properly configured for starting video calls to the frontdesk, then whenever a customer starts a call from the console a call notification will appear to the operators on the frontdesks. The notification will show you which lane the video call is coming from and a ringing sound will be reproduced:
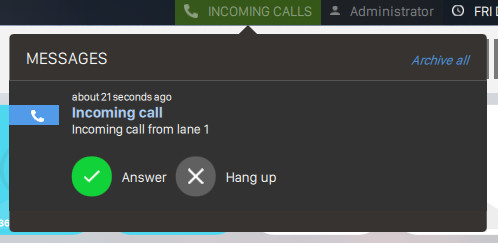
Click on Answer button to instantly start a video call with the relative console or click Hang up button to refuse it. Once the call has been accepted a video call will be started and shown on a pop-up:

Drag and drop the window on the position you prefer. Click on the red button to hangup the video call or click on the blue button to minimize the window.

If you click on the cog icon on top right of the window you can customize the video call parameters:
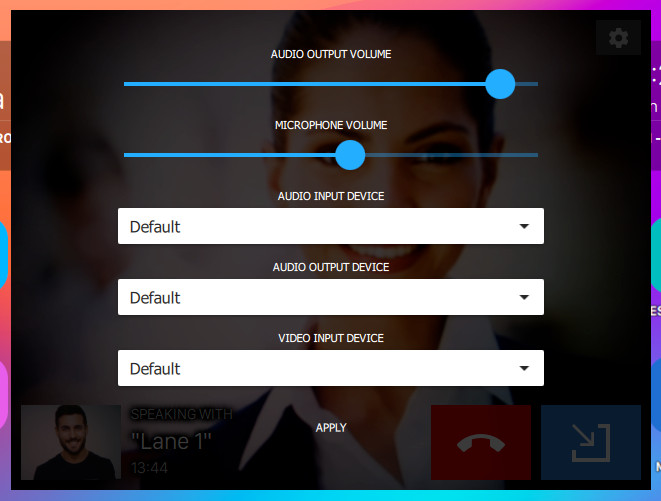
The following settings are available:
-
Setup the audio output volume by dragging the relative slider
-
Setup the microphone volume by dragging the relative slider
-
Select the audio input device from the list of available devices
-
Select the audio output device from the list of available devices
-
Select the video input device from the list of available devices
Click on apply button to apply the changes.
4.5 Customize the Dock

It is possible to customize the icons of the the dock and the desktop. Long press any icon or click the wheel icon on the desktop to open the desktop configuration window. From here you can customize the order and the visibility of any icon by dragging and dropping icons. Once a position or the visibility of an item is changed the alterations are automatically saved. You can press restore all icons button to restore the position and visibility of items at their original setup.
It is also possible to change the background of the desktop by clicking the relative button located on the top right of the window. After clicking on the icon the media browser window will appear and you will be asked to choose or upload a background image. Select the uploaded image and click Ok button to use the selected image as desktop background.
You can also customize the position of the dock by clicking on the four dots icons locates at the edges of the screen. Three different positions are available:
-
Bottom edge
-
Left edge
-
Right edge
Note that each operator can have its own background image and desktop customization.