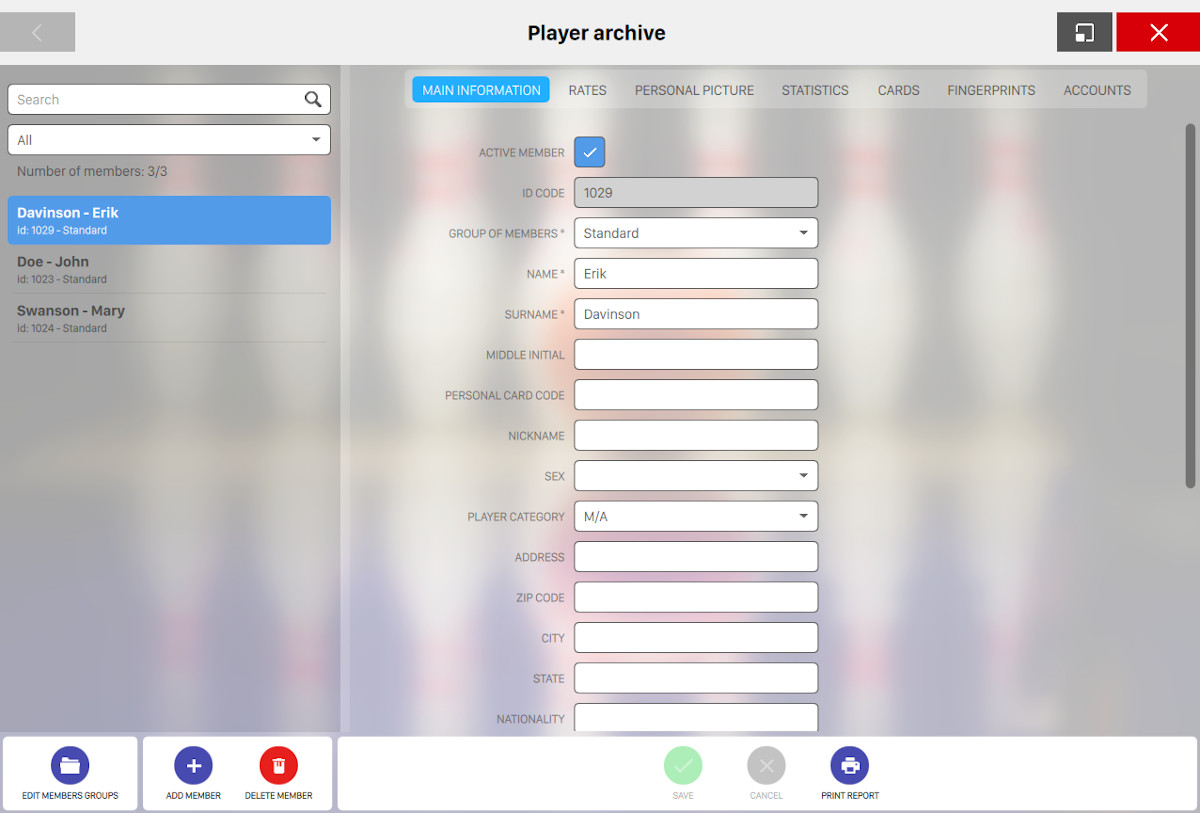
This window allows you to manage all the members thata have been registered to the bowling center. Members are organized into groups and this allows you to assign custom rates to each group. On the left side of the window you can find the list of all the registered members. Select a group from the dropdown or enter some arbitrary text on the search field to filter the list. Just below the filters you can find the result summary. The search field allows you to filter the list by entering the id, name, the surname, the nickname or the initials of the member.
For each member on the list you can see:
-
The surname and the name of the player
-
The assigned id and the group the player belongs to
Select a member row to see / edit his details. Click on the Add member button below the list to add a new member or click on Delete member button to remove him.
Information and customizations for each member are organized into tabs:
13.1 Main Information
From this tab you can set all the basic information of the member.
-
Active member: indicates whether the member is active or not
-
ID code: shows the member’s ID. This field is readonly
-
Group of members: allows you to select the group the member belongs to by selecting it from the list
-
Name: indicates the name of the member
-
Surname: indicates the surname of the member
-
Middle initial: indicates the middle initials of the member
-
Personal card code: indicates the code of the member’s personal card
-
Nickname: indicates the nickname of the player that can be visualized by default on the lane monitors. If nickname is empty than name and surname will be used
-
Sex: select the gender of the member, which can be male or female
-
Player category: choose the player category from the list
-
Address: indicates the address of the member
-
Zip code: indicates the zip code of the member
-
City: indicates the city where the member lives
-
State: indicates the state where the member lives
-
Nationality: indicates the nationality of the member
-
Date of birth: select the date of birth of the member by selecting it with the calendar widget. Click on the calendar icon to open it
-
Home phone: indicates the home phone of the member
-
Mobile phone: indicates the mobile phone of the member
-
Main e-mail: indicates the main email address of the member
-
Secondary e-mail: indicates the secondary email address of the member
-
Shoe size: indicates the shoe size of the member
-
Introduced by: indicates by whom the member was introduced to the bowling center
-
Private notes: indicates some private notes for the member
13.2 Rates
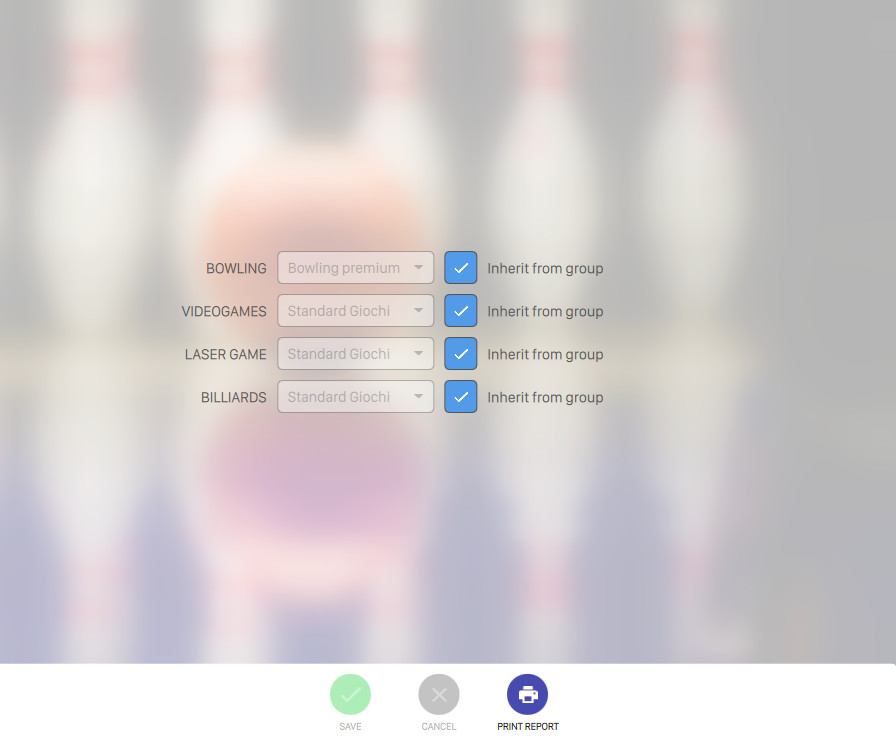
In this section it is possible to assign special rates to the members. Normally the rates are inherited by the member’s group. For more information on member’s groups definition see Member groups section. For each department it is possible to specify a different rate. For more information on rates definition see rate definition section. The option Inherit from group on the right side of each rate, allows you to use the members group’s rate. All the rates assigned here will be automatically attributed to the player when the player is added to a game.
13.3 Personal Picture
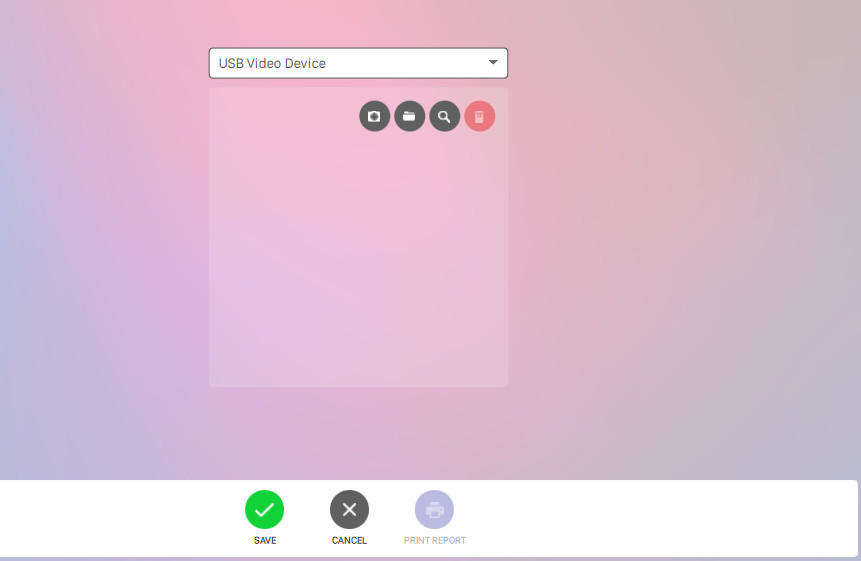
This window allows you to add a picture to the selected member. The member picture is useful to recognize the member when he uses the card and allows the system to send the member’s picture to the lanes monitors during a game. To select a picture for the member you must first select the webcam device from the list of available device and then click on new photo button.
At this point the webcam will become active. Click on Capture button to take a picture or click on Cancel button to discard the operation. After you have taken a picture with the webcam you can click on Delete photo to remove the picture.
13.4 Statistics
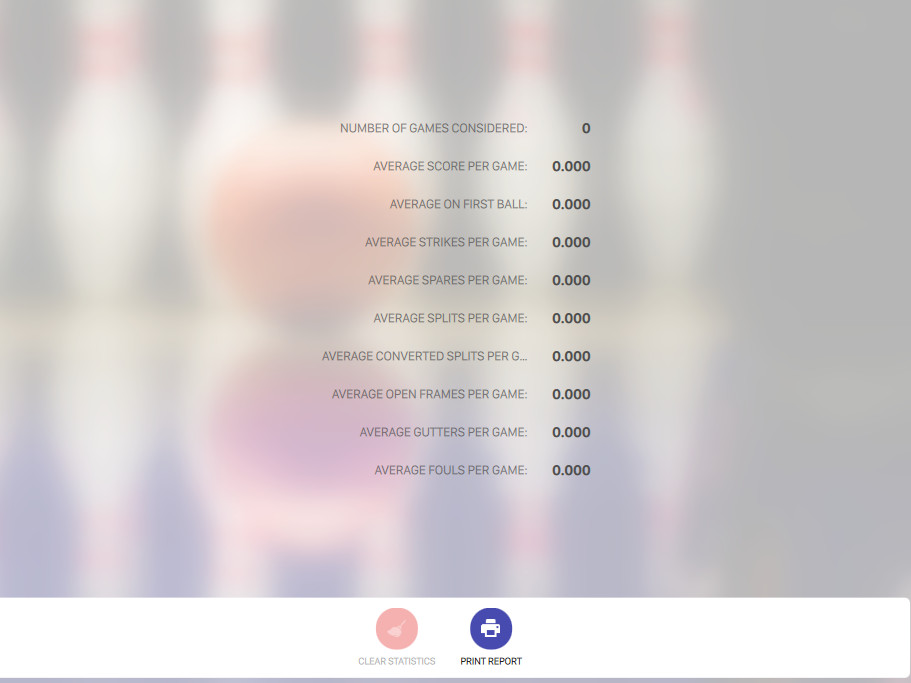
This window allows you to see the members’ statistics related to the Bowling games. Every gamed played by the members will be stored into the database and the related information will be used to update the statistics. List of information:
-
Number of games considered: the quantity of games played by this member since his registration
-
Average score per game: the member’s average score per bowling game
-
Average on first ball: the average score with the first ball of each frame. This value goes from 0 to 10
-
Average strikes per game: the average number of strikes scored in each game. This value goes from 0 to 12
-
Average spares per game: the average number of spares scored in each game. This value goes from 0 to 10
-
Average splits per game: the average number of splits scored in each game. This value goes from 0 to 11
-
Average converted splits per game: the average number of splits converted in each game. This value goes from 0 to 11
-
Average open frames per game: the average number of open frames in each game. This value goes from 0 to 10
-
Average gutters per game: the average number of gutter balls in each game. This value goes from 0 to 20
-
Average fouls per game: the average number of fouls done in each game. This value goes from 0 to 20
13.5 Cards
This window allows you to assign to the members, one or more magnetic cards or to assign one or more members to an existing card. The cards can be used to add a member to a game. It is possible to assign more cards to a member and each card can have a different expiration date. It is also possible to assign one card to a group of members: this allows you to group some members who usually come to play all together using the same card.
When a card is swiped through the card reader, a window pops up and it is possible to choose the
players to add to the game. For more information on how to use cards when opening games see
Adding bowlers using the magnetic card section from Lane management > Open a new game
window.
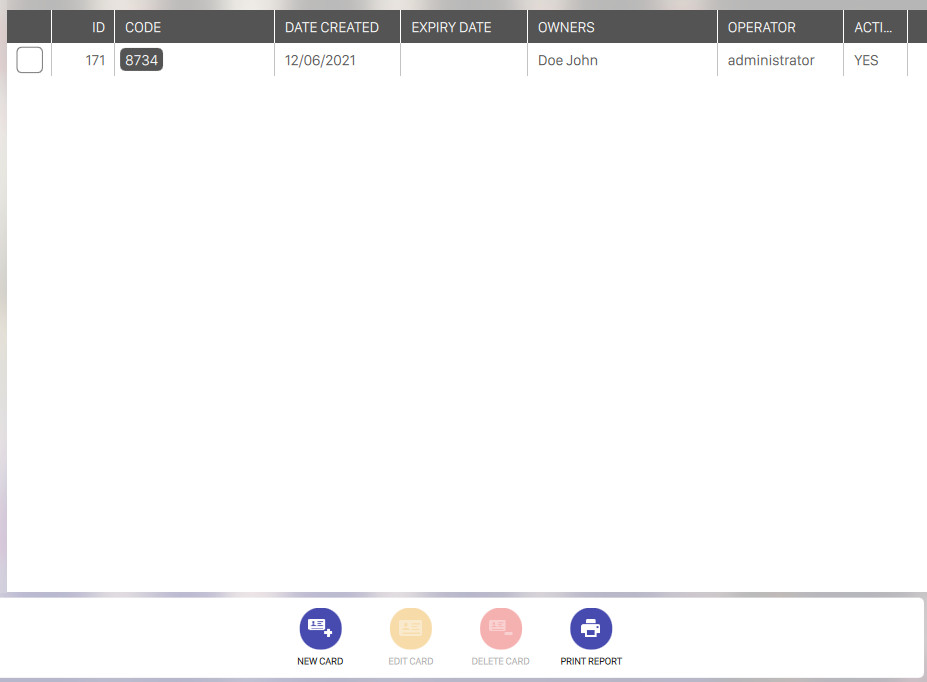
On the central area of the window you can find the list of the available cards for the selected member. For each row you can see:
-
A checkbox which allows you to select or deselect the card
-
Id: represents the unique identifier of the card
-
Code: represents the code of the card
-
Date created: represents the date of when the card has been created
-
Owners: displays the name and surname of the owner(s) of the card. Note that a card can be shared between multiple owners
-
Operatore: indicates the operator that created the card
-
Active: indicates whether the card is active or not
On the bottom area of the window you can find a list of buttons:
-
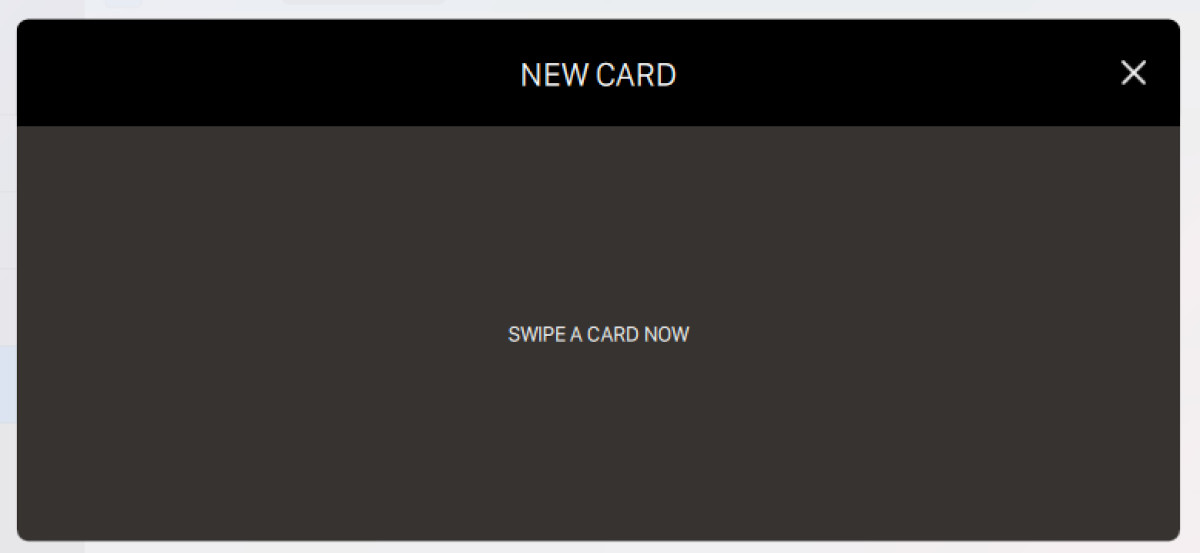
New card: allows you to swipe a new card and assign it to the current member. After clicking on it a dialog will appear and will ask you to swipe a card
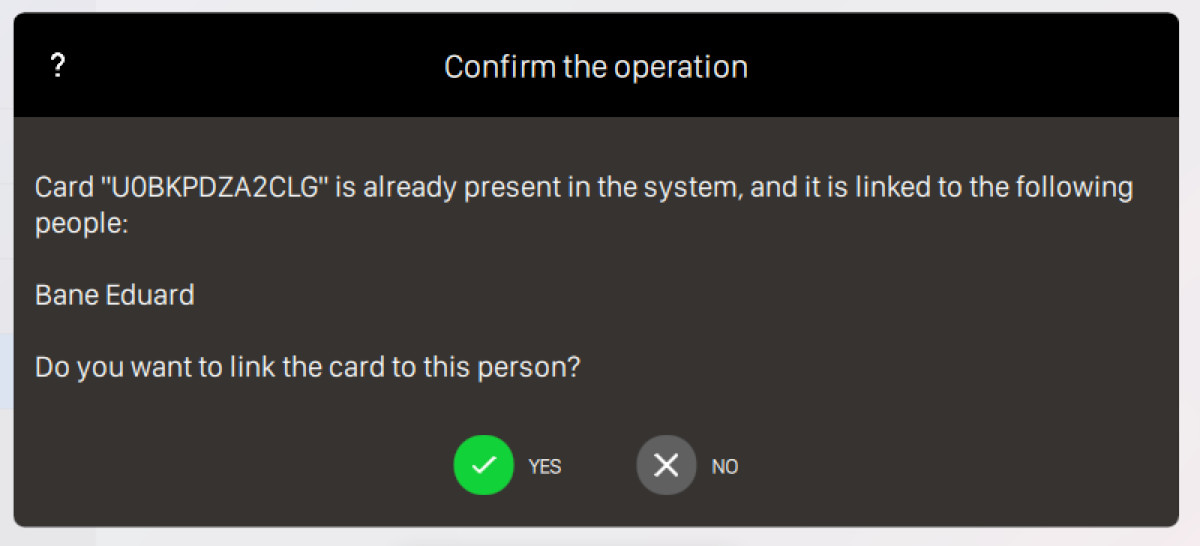
If you swipe a card that has been already assigned to one or more members you will be notified by another dialog:
-
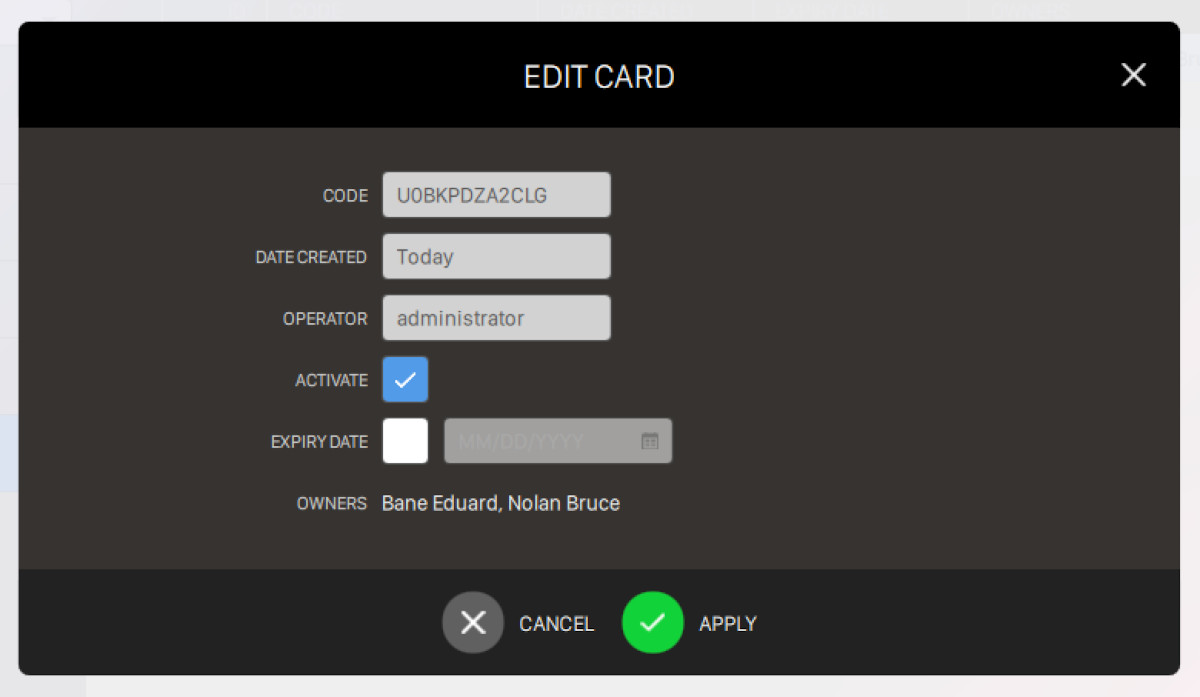
Edit card: allows you to edit the selected card. A dialog will appear and will ask you to update the information related to the card:
-
Code: indicates the code that has been assigned to the card. This field is readonly
-
Date created: indicates the date of when the card has been created. This field is readonly
-
Operator: indicates the operator that created the card. This field is readonly
-
Activate: toggle this option to enable or disable the card. Note that if you swipe a card that is not active then it will not be recognized by the system
-
Expiry date: toggle this option to set an expiration date to the selected card
-
Owners: indicates the name and surname of the owners(s) of the card. This field is readonly
Click on Apply button to confirm the changes or click on Cancel button to discard them
-
-
Delete card: allows you to remove the selected card. Note that if a card has an active balance then it is not possible to remove it
13.6 Fingerprints
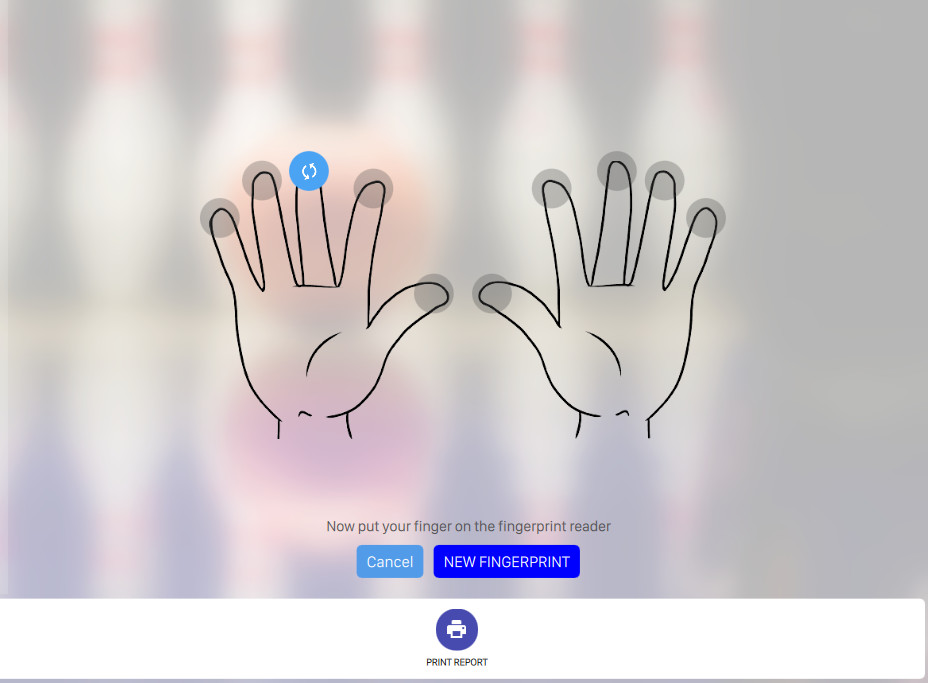
This window allows the member to register his own fingerprints that can be used for recognition. Choose the fingertip that you want to memorize and put the finger on the fingerprint reader. It is possible to memorize more than one finger.
13.7 Accounts
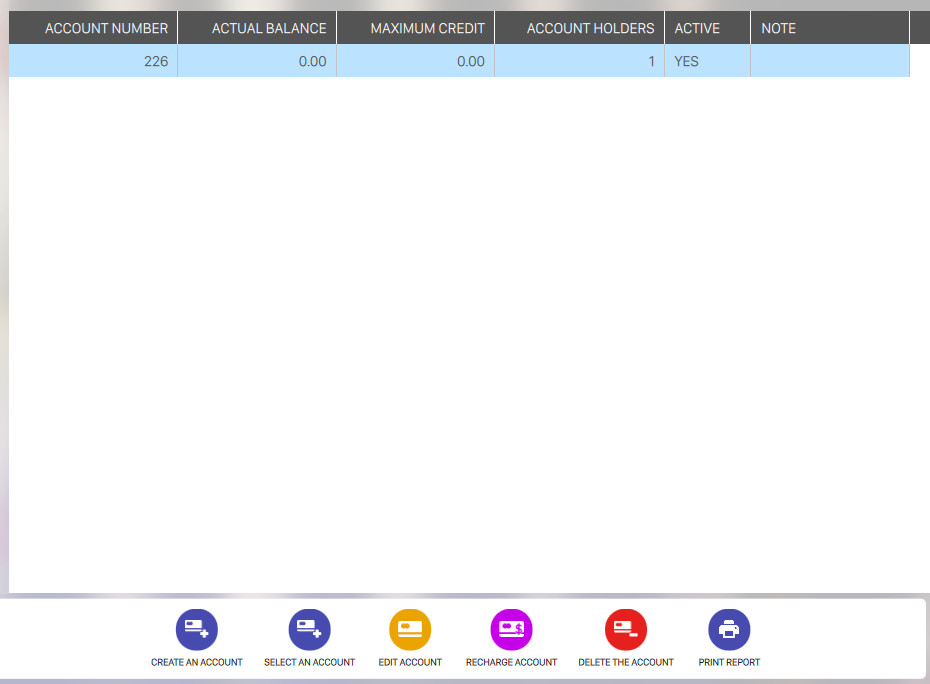
This window allows you view all the accounts related to the selected member and to create a new one. An account can be used by the member at the bowling center as a debit card. Accounts can be used to pay any game, order or item purchased at the bowling center.
On the central area of the window you can see the list of accounts created so far. For each row:
-
Use the checkbox to select / deselect the account
-
Account number: indicates the number of the account
-
Actual balance: indicates the current balance of the account
-
Maximum credit: indicates the maximum amount of money that the bowling center can credit to the member. Leave this value to 0 if you want to work only with non-negative accounts
On the bottom area of the window you can find a list of buttons:
-
Create an account: allows you to create a new account. A confirmation window will appear before proceeding with the creation:
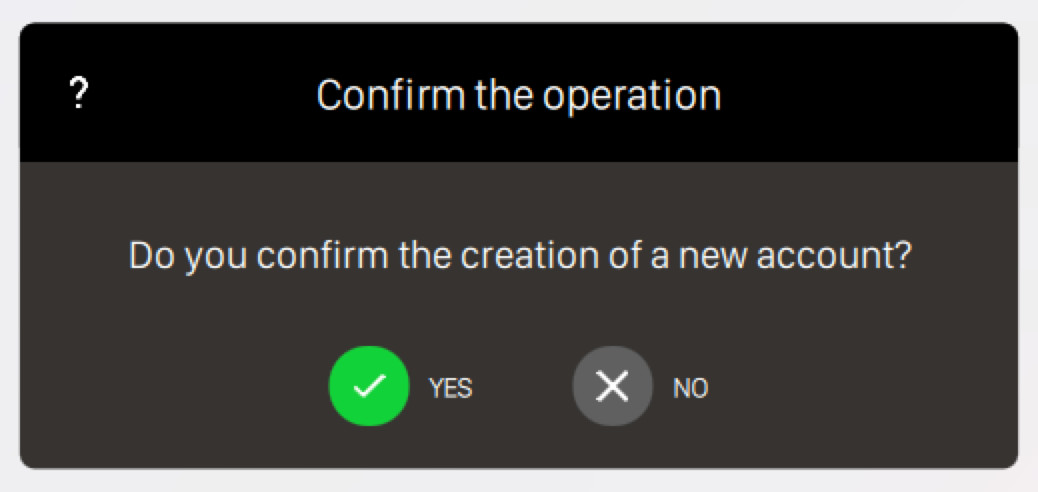
Click on Yes button to confirm the creation of a new account or click No button to cancel the operation. After creating a new account a new row will be added to the accounts list
-
Select an account: allows you to select an existing account amont all the defined accounts of all members and assign it to the current member

Enter some arbitrary text on the search field to filter the list. For each row item you can see:
-
Number: the account number
-
Balance: the current balance of the account
-
Availability: indicates the maximum amount of money that the bowling center can credit to the member
-
Account holders: indicates the name and the surname of the account holder(s)
Select an item and click on Apply button to assign the selected item to the current member. Click Cancel button to discard the operation and close the dialog
-
-
Edit account: allows you to edit the configuration of the selected account. After clicking on this button a dialog will appear:
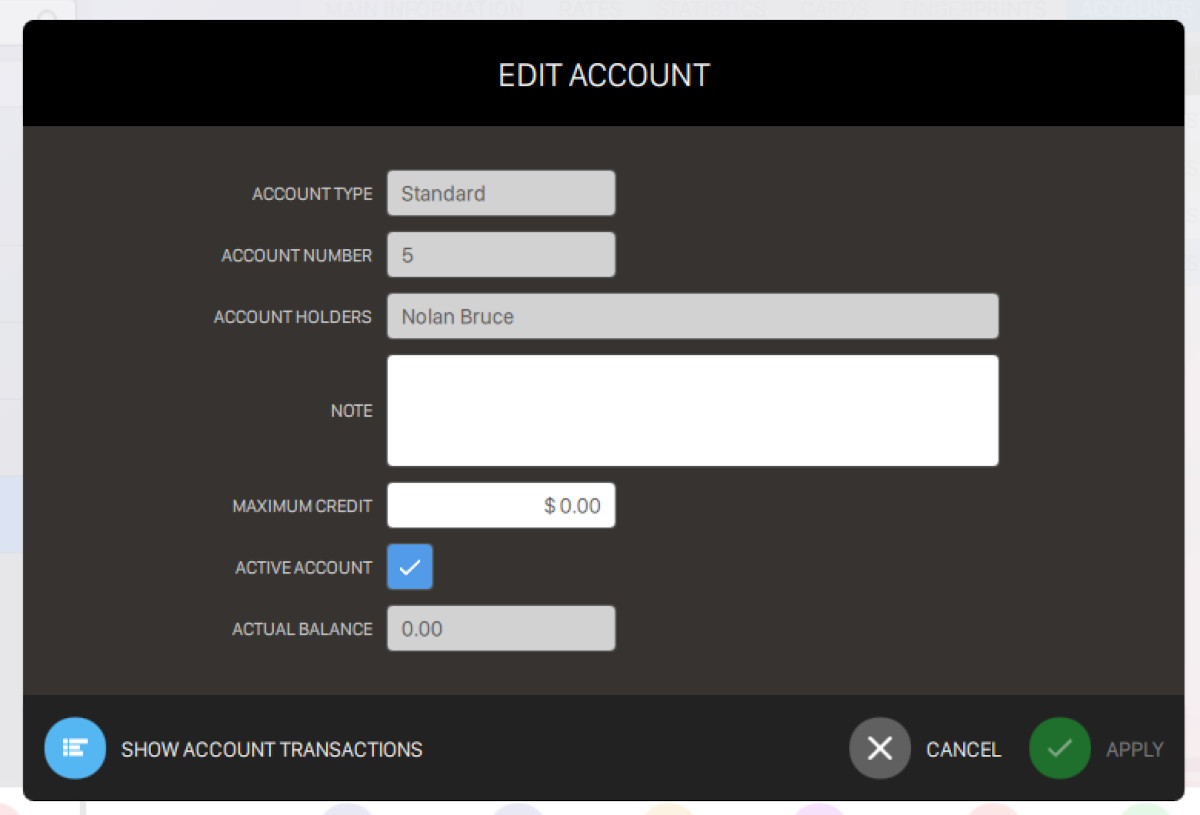
From this window you can edit:
-
Account type: indicates the account type, which can be:
-
Standard: accounts created from the player archive section
-
Deposit: accounts created when the member deposit some money when creating a reservation
This field is readonly
-
-
Account number: indicates the number of the account. This field is readonly
-
Account holders: indicates the name and surname of the account holders. This field is readonly
-
Note: allows to enter some arbitrary notes
-
Maximum credit: allows to enter the maximum amount of money that the bowling center can credit to the member. Leave this value to 0 if you want to work only with non-negative accounts
-
Active account: toggle this option to enable or disable the account
-
Actual balance: indicates the current balance of the account. This field is readonly
Right below the form you can find an additional button named Show account transactions. By clicking on this button a dialog will appear and you will see all the transactions created with the current account
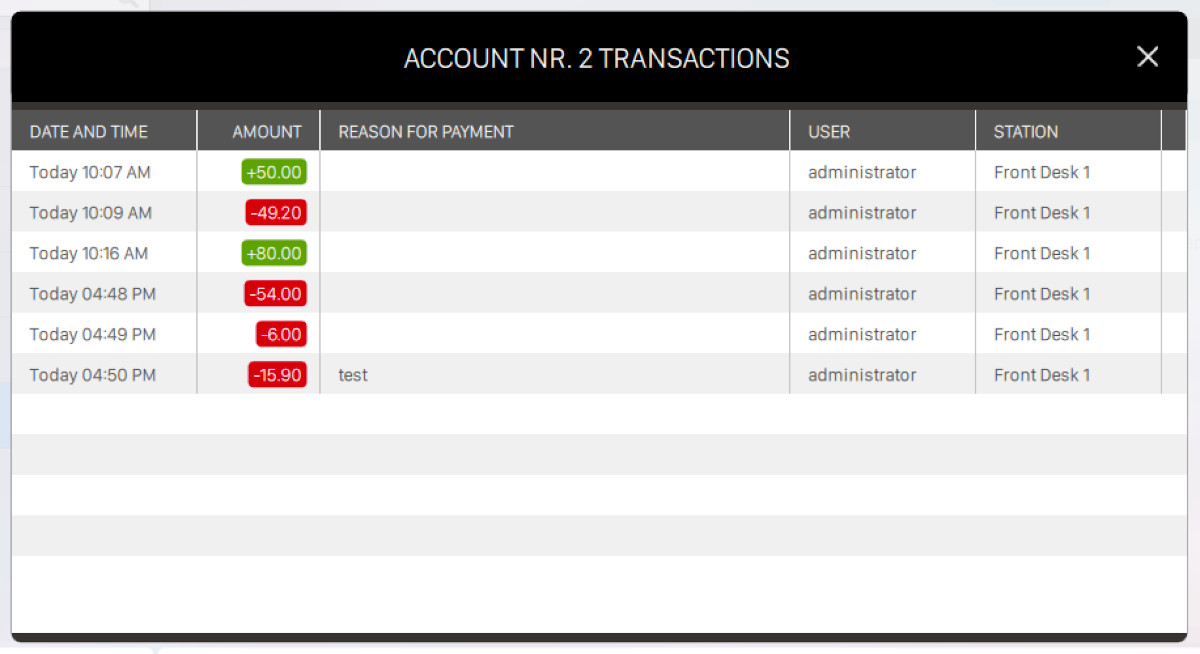
For each row of this list you can see:
-
Date and time: indicates the date and time of the transaction
-
Amount: indicates the amount of the transaction. If the transaction is positive then the label will be highlighted with green color, else if negative the label will be highlighted with red color
-
Reason for payment: shows the notes related to the payment
-
User: indicates the name of the operator that created the transaction
-
Station: indicates the front desk name where the transaction has been created
Click on Apply button to confirm the changes or click on Cancel button to discard them.
-
-
Recharge account: allows you to create a recharge for the selected account. A dialog will appear:
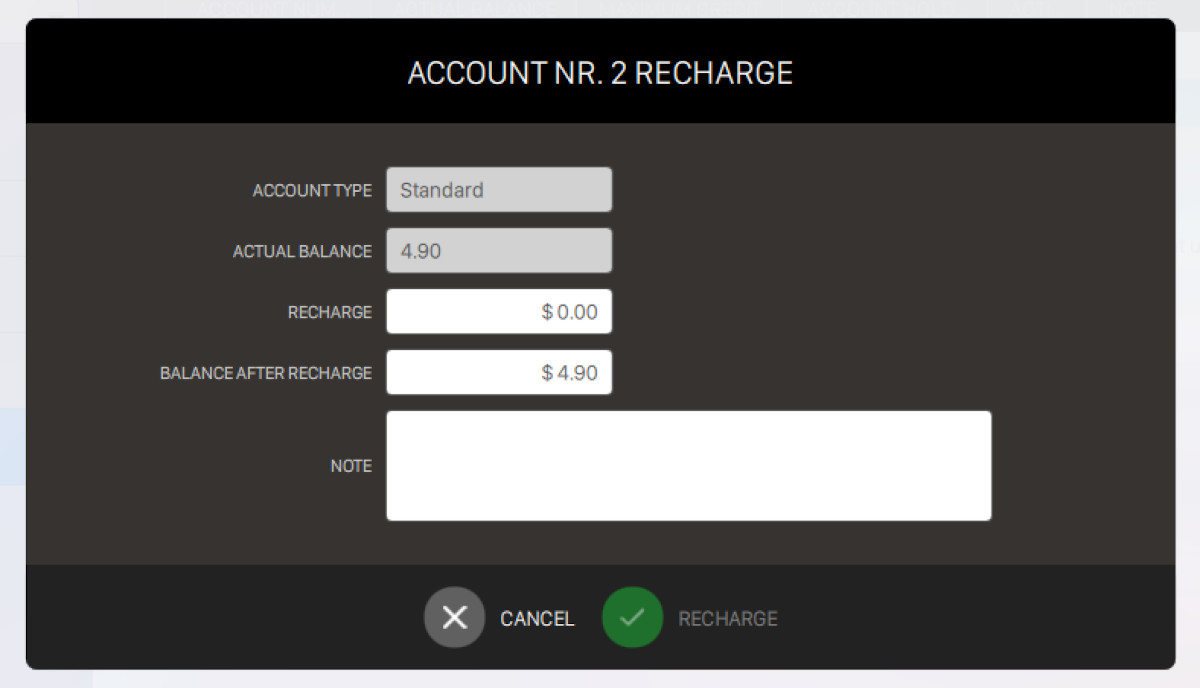
This window allows you to view and enter the required information for creating a recharge:
-
Account type: indicates the account type, which can be:
-
Standard: accounts created from the player archive section
-
Deposit: accounts created when the member deposit some money when creating a reservation
This field is readonly
-
-
Actual balance: indicates the current balance of the account. This field is readonly
-
Recharge: enter the amount of money for the recharge
-
Balance after recharge: indicates the amount of money that the account will hold after the current recharge
-
Note: enter some arbitrary note for the recharge transaction
Click on Recharge button to confirm the operation or click on Cancel button to discard it
-
-
Delete the account: allows you to remove the selected account. Note that it is not possible to remove an account with an active balance
13.8 Additional actions
-
Save or Cancel: this button is visible only when creating a new member or when editing an existing member and there are pending updates. Click on save to save the current changes or click on cancel to discard them
-
Print report: allows you to select a type of report that you want to print for the selected member
-
Print basic card: takes you to the report page and prints a report with the member information, statistics and a picture of the member
-
Print detailed card: takes you to the report page and prints a report with the member information, statistics, reserved data and a picture of the member
-
Print list: takes you to the report page and prints the member list
-
13.9 Members Groups
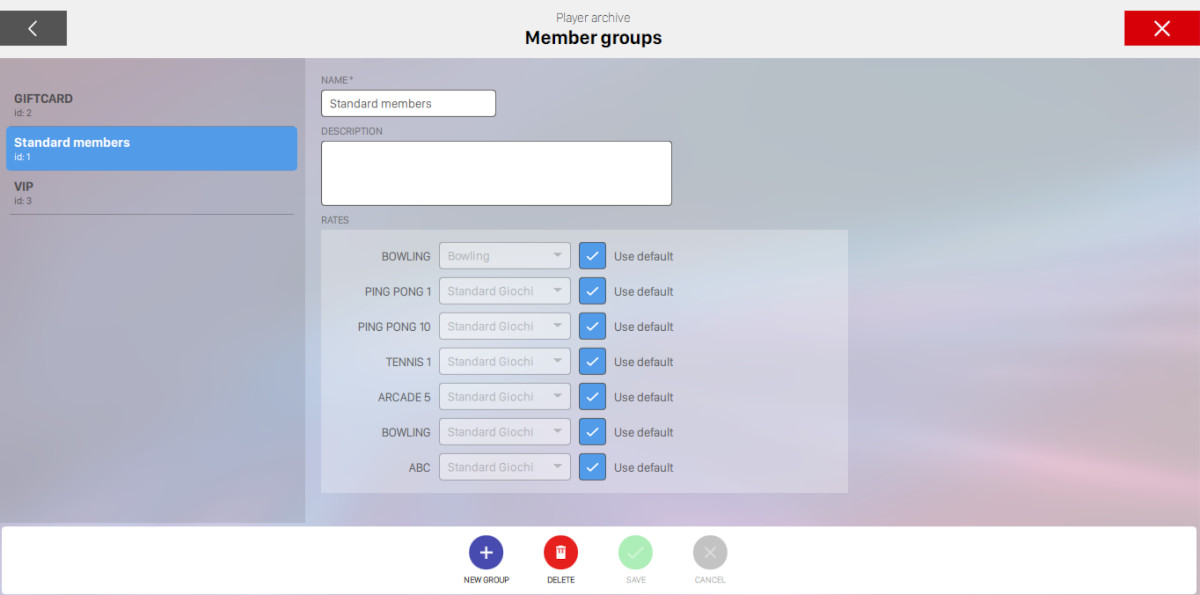
This section allows you to define the members’ groups and to assign them specific rates. For each group it is possible to define:
-
Name: represent the group name
-
Description: allows you to enter some notes for the group
-
Rates: it is possible to assign a custom rate for each department. For more information on the rates see Rate definition section. The option ‘Use default’ on the right side of each rate allows you to restore the default rate for that department. For more information on default rates see Set default rate section. All rates here assigned will be automatically used for all the members of that group, unless a specific member’s rate overrides it.
13.9.1 Available actions
At the bottom of the screen there are some actions available:
-
New group: allows you to create a new group of members
-
Delete: removes the selected members group. Note that it is not possible to cancel a group with members
-
Save: saves the current changes
-
Cancel: discard the current changes and restores the previous settings